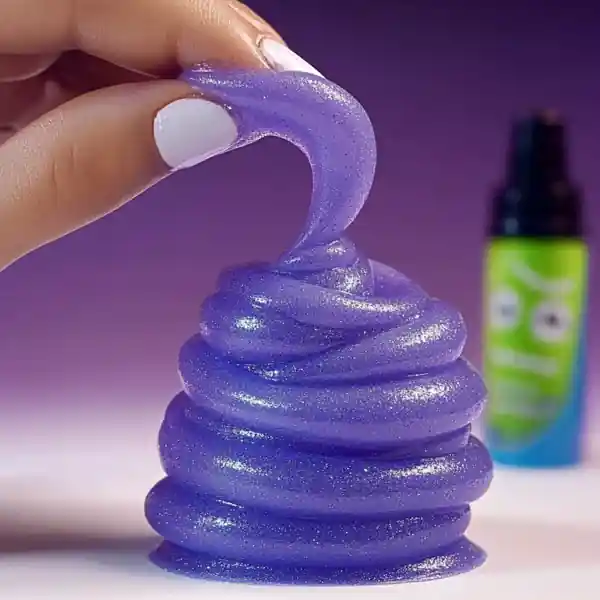
Slime crafting has exploded in popularity over the last few years, and for good reason. It’s a hands-on activity that not only engages the senses but also stimulates creativity. If you’re looking for a unique and squishy slime variety to try, DIY Jelly Snow Slime is a fantastic choice. With its jelly-like transparency and cool-to-the-touch feel, this slime is perfect for sensory play or just some satisfying squishes and stretches.
This easy recipe uses common household ingredients and takes just a few minutes to make. Whether you’re a parent looking for an indoor activity for the kids or a slime enthusiast expanding your collection, this guide covers everything you need to get started.
What Makes Jelly Snow Slime Special?
Aesthetic Appeal and Texture
Unlike traditional opaque slime, Jelly Snow Slime has a clear, almost crystalline look that mimics frosty winter snow. The jelly-like texture makes it exceptionally stretchy and soft, providing a unique sensory experience. Adding food coloring can turn it into a vibrant snow-like creation, giving it even more visual charm.
Perfect for All Seasons
While it’s inspired by winter, Jelly Snow Slime is great for year-round fun. In the summer, it can become an icy-themed project. During the holidays, a dash of glitter or scent can make it festive. Its versatility makes it a favorite for kids and adults alike.
How to Make DIY Jelly Snow Slime
Ingredients
To create your batch of Jelly Snow Slime, gather these simple ingredients:

- 1 cup clear glue
- 1/2 teaspoon baking soda
- 2 tablespoons water
- A few drops of food coloring
- Optional: saline solution or contact lens solution
Directions
Follow these straightforward steps for a smooth slime-making experience:
Step 1: In a mixing bowl, pour 1 cup of clear glue. This is your slime’s base and gives it the jelly-like appearance.
Step 2: Add 1/2 teaspoon of baking soda to the glue. Mix thoroughly to ensure it is completely dissolved and evenly distributed.
Step 3: Slowly add 2 tablespoons of water while stirring. This helps to begin forming the slime’s signature stretchy texture.
Step 4: Add a few drops of food coloring. Pick your favorite hue and stir well until the color is evenly mixed throughout the slime.
Step 5: (Optional) To firm up the slime, add a small amount of saline solution or contact lens solution. Stir continuously until the slime starts to pull away from the sides of the bowl.
Step 6: Use your hands to knead the slime. This step brings everything together and helps you reach the desired consistency. Keep kneading until it’s soft, stretchy, and no longer sticky.
Step 7: Store your Jelly Snow Slime in an airtight container to keep it fresh and ready for future play sessions.
Tips for Success and Creative Variations

Customize Your Slime
Get creative by customizing your Jelly Snow Slime. Add glitter for a snowy sparkle or mix in tiny foam beads for a crunchy snow effect. A few drops of peppermint or vanilla extract can give it a delightful scent, making the sensory experience even more enjoyable.
Storage and Longevity
Slime tends to dry out over time, especially when exposed to air. To maximize the life of your slime, always store it in an airtight container. If it starts to harden, try kneading in a little water or saline solution to bring back its softness. On average, well-stored slime can last up to two weeks.
Print
DIY Jelly Snow Slime: A Fun, Easy Craft for All Ages
- Total Time: 5 minutes
- Yield: 1 batch
Description
Fun, stretchy, and perfectly gooey, this DIY Jelly Snow Slime is an easy craft activity made with just a few household ingredients. Great for sensory play!
Ingredients
1 cup clear glue
1/2 teaspoon baking soda
2 tablespoons water
A few drops of food coloring
Optional: saline solution or contact lens solution
Instructions
Pour 1 cup of clear glue into a mixing bowl.
Add 1/2 teaspoon baking soda and mix until fully combined.
Slowly stir in 2 tablespoons of water.
Add a few drops of food coloring and stir until evenly distributed.
Optional: Add a small amount of saline solution or contact lens solution to firm up the slime.
Knead the slime with your hands until soft and stretchy.
Store in an airtight container when not in use.
Notes
Add glitter or foam beads for extra sparkle and texture. Always store slime in an airtight container to keep it fresh.
- Prep Time: 5 minutes
- Cook Time: 0 minutes
- Category: Craft/DIY
- Method: Mixing
- Cuisine: Not applicable