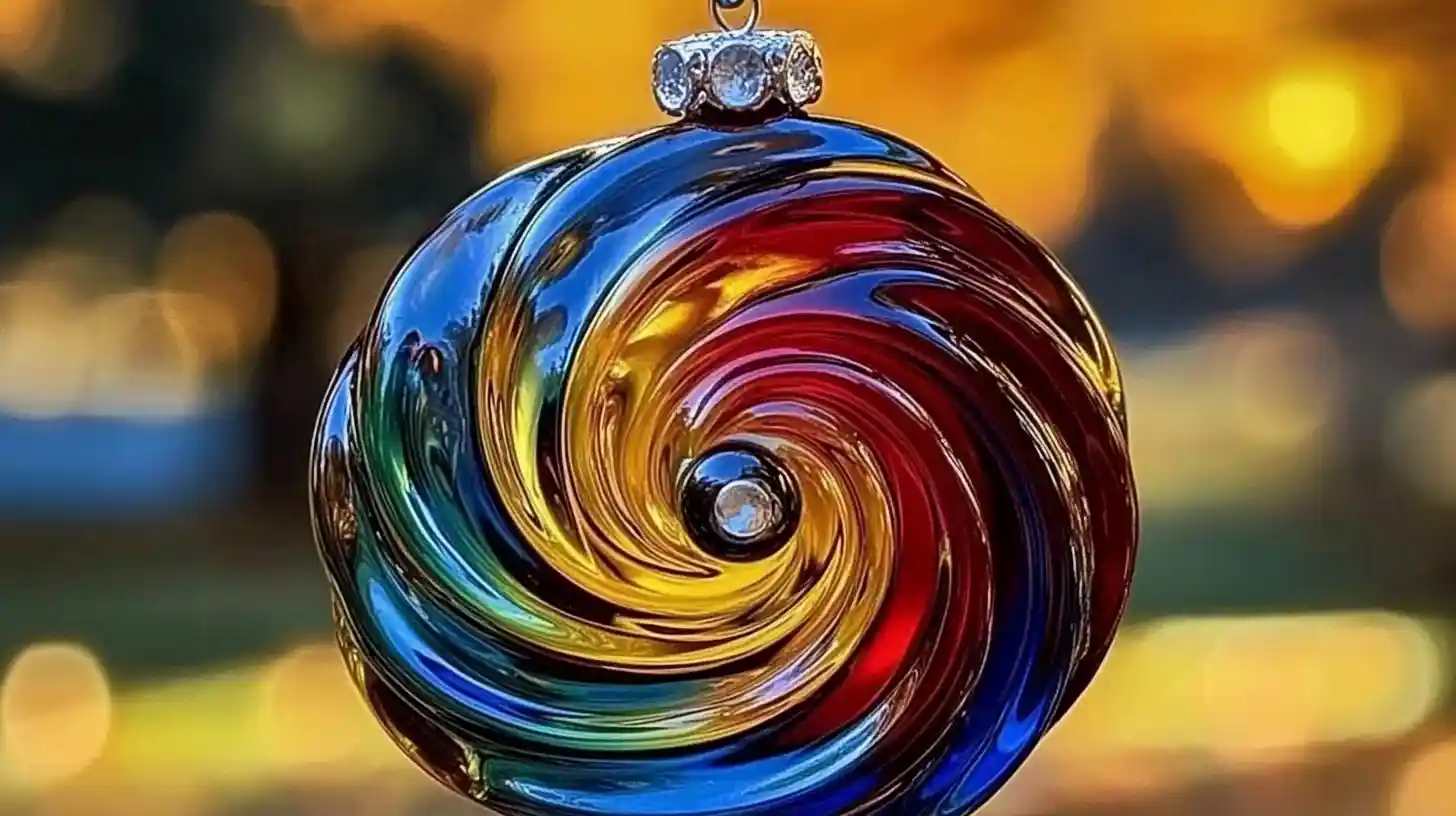
Creating suncatchers is a fun and vibrant craft that brightens any window with a swirl of color. This easy project uses simple household materials to transform ordinary glue into stunning works of art. Perfect for kids and adults alike, this craft brings a touch of magic into your home with minimal effort. Whether you’re looking to decorate for a holiday or just add some cheerful color, this glue suncatcher project is sure to delight.
Why Make Glue Suncatchers?
Glue suncatchers are not only affordable and simple but also provide endless creative possibilities. You can play with different color combinations, patterns, and themes to create a truly unique design. Plus, this activity doubles as an educational experience for kids, teaching them about color mixing and artistic expression. Hang your finished masterpiece in a sunny spot, and watch your home glow with beautiful rainbow reflections.
Benefits of This Craft
- Affordable & Easy: Requires common household items like glue and food coloring.
- Customizable: Endless design and color options to suit your decor.
- Kid-Friendly: Safe and fun for all ages with minimal supervision.
Ideal Occasions
This craft is perfect for rainy-day activities, classroom art projects, or seasonal decorations. Make a batch of them for gifts during the holidays or use them to celebrate special occasions like birthdays and festivals.
How to Make Glue Suncatcher Magic
This project is simple and mess-friendly, but the results are stunning. Below you’ll find everything you need, including the materials list and step-by-step instructions.
Ingredients
- Clean plastic lid (such as from yogurt or sour cream containers)
- White school glue (Elmer’s or similar)
- Liquid watercolors (or food coloring mixed with a little water)
- Toothpicks
- Hole punch
- Ribbon or string for hanging

Directions
- Prepare the Lid
Wash and dry the plastic lid thoroughly to ensure the glue adheres properly. Optionally, use a permanent marker to draw black outlines for a stained-glass effect. - Pour the Glue
Fill the lid with white school glue to about a ¼-inch thickness. Spread it evenly with a popsicle stick for a smooth surface. - Add Colors
Drop 2–3 colors of liquid watercolor (or diluted food coloring) onto the glue. For vibrant results, choose colors that contrast but blend beautifully, such as blue and green for ocean themes or red, orange, and yellow for sunset vibes. - Create Patterns
Use a toothpick to gently swirl the colors together, forming marbled effects, spirals, or tie-dye patterns. Don’t over-mix—distinct colors look best! - Dry the Suncatcher
Allow the lid to sit undisturbed on a flat surface for 48–72 hours. To prevent dust, cover it loosely with an inverted bowl during drying. - Finish and Hang
Once completely dry, peel the hardened glue from the lid. Punch a hole near the top, thread a ribbon through it, and hang it in a sunny window to enjoy the rainbow effect.
Tips & Creative Variations

Fun Design Ideas
- Galaxy Theme: Mix purple, black, and silver glitter for a cosmic look.
- Ocean Waves: Combine blues and greens with a hint of white for sea-inspired beauty.
- Festive Colors: Use red and green for Christmas, orange and black for Halloween, or pastels for Easter.
Extra Crafting Tips
- Avoid Cracks: Ensure an even glue layer to prevent cracking while drying.
- Speed Drying: Place the lid in a warm, dry room. Avoid direct sunlight until fully hardened.
- Unique Shapes: Try different lids for various sizes and designs.
Glue Suncatcher Magic – Liquid Rainbows for Your Windows!
- Total Time: 48–72 hours (including drying time)
- Yield: 1 suncatcher
Description
Create vibrant DIY glue suncatchers with liquid colors for stunning window decorations. Perfect for kids and adults to enjoy a fun, colorful craft.
Ingredients
1 clean plastic lid (e.g., yogurt or sour cream container)
– White school glue (Elmer’s)
– Liquid watercolors (or food coloring + water)
– Toothpicks
– Hole punch
– Ribbon or string for hanging
Instructions
1. Wash and dry the plastic lid to ensure a clean surface.
2. Pour white glue into the lid, creating a 1/4-inch layer. Spread evenly with a popsicle stick.
3. Add a few drops of liquid watercolor or food coloring in different spots on the glue.
4. Use a toothpick to gently swirl the colors, creating unique patterns like marbling or tie-dye.
5. Let it dry flat for 48–72 hours. Cover with an inverted bowl to prevent dust.
6. Once dry, peel the glue from the lid, punch a hole, and thread a ribbon through it for hanging.
Notes
For added sparkle, mix in glitter. Try different color schemes for seasonal or themed designs.
- Prep Time: 10 minutes
- Cook Time: 0 minutes
- Category: DIY
- Method: Pouring and drying
- Cuisine: N/A