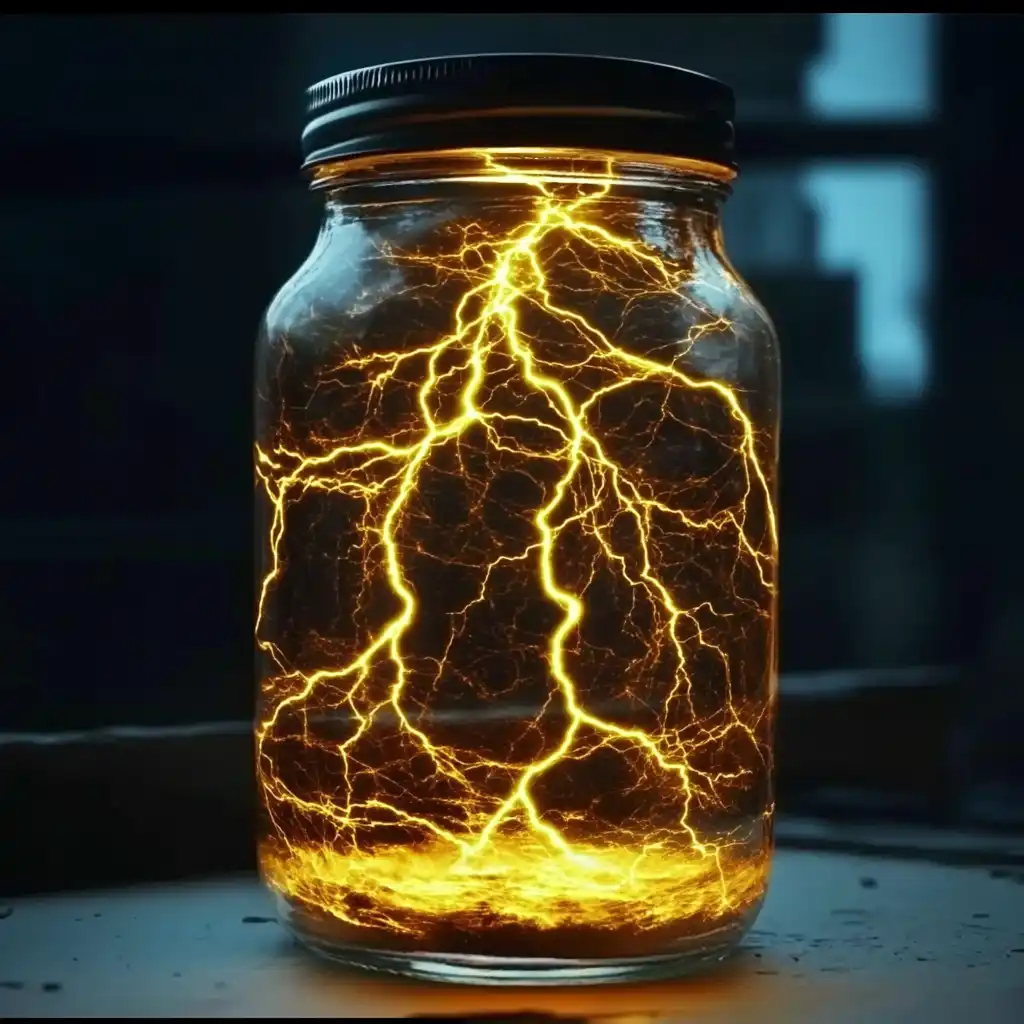
There’s something fascinating about storms — the energy, the light, the movement. What if you could recreate that electric excitement right in your kitchen? With just a few simple household ingredients, you can make a “lightning storm” in a jar that glows and swirls like a miniature tempest. This glowing science experiment is not only eye-catching but also a fun way to introduce kids (and curious adults) to basic chemistry and physics. Perfect for rainy-day entertainment or a unique science fair idea, this DIY project combines visual magic with simple learning.
Whether you’re a parent looking for a hands-on activity, a teacher prepping a class experiment, or just someone who loves a little science with their glow-in-the-dark fun, this stormy spectacle is a must-try.
What Makes the Lightning Storm Glow?
The Science Behind the Glow
At the heart of this experiment lies a mix of chemistry and optics. The glow-in-the-dark paint or highlighter ink contains phosphors — special compounds that absorb light and then release it slowly, causing that magical afterglow. When exposed to a blacklight, these phosphors fluoresce brightly, intensifying the glowing effect.
The liquid soap adds another layer of fascination. It helps break the surface tension of the water, allowing the vinegar to interact more dramatically. This creates subtle swirls and bubbles, mimicking the chaotic energy of a storm. As the light bounces off these moving elements, it gives the illusion of flickering lightning bolts dancing through the jar.
Why Use Vinegar and Soap?
Vinegar (acetic acid) and soap don’t just sit quietly in the jar — they react in a subtle but visually dynamic way. The vinegar slightly alters the pH of the liquid mixture, which affects how the soap behaves. Combined with the warm water, this leads to a swirling motion inside the jar, resembling storm clouds churning in the atmosphere. It’s not an explosive chemical reaction, but it’s just enough to bring your glowing mixture to life.
How to Make Your Own Glowing Lightning Jar
Ingredients (For 1 Jar)
- 1 clear glass jar (mason jar or large drinking glass)
- 1 tsp glow-in-the-dark paint (or fluorescent highlighter ink)
- 1 cup warm water
- 2 tbsp clear liquid soap (dish soap works well)
- 1 tbsp white vinegar
- 1–2 drops blue food coloring (optional, for stormy vibes)
Directions
- Prepare Your Storm Chamber:
Start with a clean, clear jar. This will be your “lightning chamber,” so ensure it’s free of any residue that could cloud the effect. - Mix the Glowing Base:
In a mixing cup, combine 1 cup of warm water with 1 tsp of glow-in-the-dark paint or highlighter ink. Stir well until it dissolves completely. You can test the glow by shining a blacklight over the mixture. - Add Soap for Lightning Movement:
Stir in 2 tablespoons of clear liquid dish soap. This helps create the swirling patterns you’ll see later, similar to how lightning twists and turns. - Activate with Vinegar:
Pour in 1 tablespoon of white vinegar. This causes a mild reaction that energizes the mixture and boosts movement within the jar. - Color the Storm (Optional):
Add 1–2 drops of blue food coloring for an atmospheric, stormy look. This step is purely for aesthetics and adds visual depth to the “clouds.” - Pour and Seal:
Carefully pour your mixture into the jar. Close the lid tightly. - Create the Lightning Effect:
In a dark room, gently swirl or shake the jar. Shine a flashlight or blacklight onto it. You’ll see glowing “lightning bolts” curl and flow through the liquid, creating a magical storm right in your hands.
Make It a Learning Adventure

Educational Benefits
This glowing jar isn’t just mesmerizing — it’s educational. Kids can learn about light refraction, chemical reactions, and liquid density in one go. The project opens up discussion around how real lightning works and why storms form in our atmosphere. You can even tie it into lessons on weather, physics, or environmental science.
For older children, this can be a fun intro to the concept of non-Newtonian fluids, and how different substances interact in unpredictable ways. The project also encourages curiosity, observation, and safe experimentation — all key traits for budding scientists.
Tips and Variations
- Use a highlighter ink for brighter results. Simply crack open a highlighter and soak the felt in warm water to extract the fluorescent ink.
- Try swirling with a magnet. Add a small metal object and use a magnet under the jar to simulate lightning vortexes.
- Make it part of a storm-themed night. Pair the experiment with a documentary about extreme weather or a thunderstorm soundtrack for ambiance.
- Reuse the jar. After the glow fades, simply recharge under light or remake the mixture with fresh ingredients.
And remember, always supervise younger children when working with liquids, even if they’re non-toxic. Safety first — science second!
Print
Spark Science at Home with a Lightning Storm in a Jar
- Total Time: 10 minutes
- Yield: 1 jar
Description
Create a glowing lightning storm in a jar using glow-in-the-dark paint, soap, vinegar, and warm water. Watch as swirling light mimics a real storm, perfect for science learning and fun!
Ingredients
1 clear glass jar (mason jar or large drinking glass)
1 tsp glow-in-the-dark paint (or fluorescent highlighter ink)
1 cup warm water
2 tbsp clear liquid soap (dish soap works)
1 tbsp white vinegar
1–2 drops blue food coloring (optional)
Instructions
Prepare a clean, clear jar to serve as your storm chamber.
In a separate cup, mix warm water and glow-in-the-dark paint or highlighter ink until fully dissolved.
Add the clear dish soap and stir gently to avoid bubbles.
Mix in the white vinegar to activate the reaction.
If desired, add blue food coloring for extra visual effect.
Pour the mixture into the jar and seal the lid tightly.
Turn off the lights and shine a blacklight or flashlight at the jar.
Gently swirl or shake and watch glowing “lightning bolts” form and move inside.
Notes
Use a blacklight for maximum glow effect. Always supervise young children during this experiment. Do not ingest contents.
- Prep Time: 10 minutes
- Cook Time: 0 minutes
- Category: Science Experiment
- Method: No-cook
- Cuisine: DIY